Home row and finger zones: your first touch typing lesson
Where your fingers rest, which finger covers which key, and a first practice routine for the home row, with a finger chart for a US QWERTY keyboard.
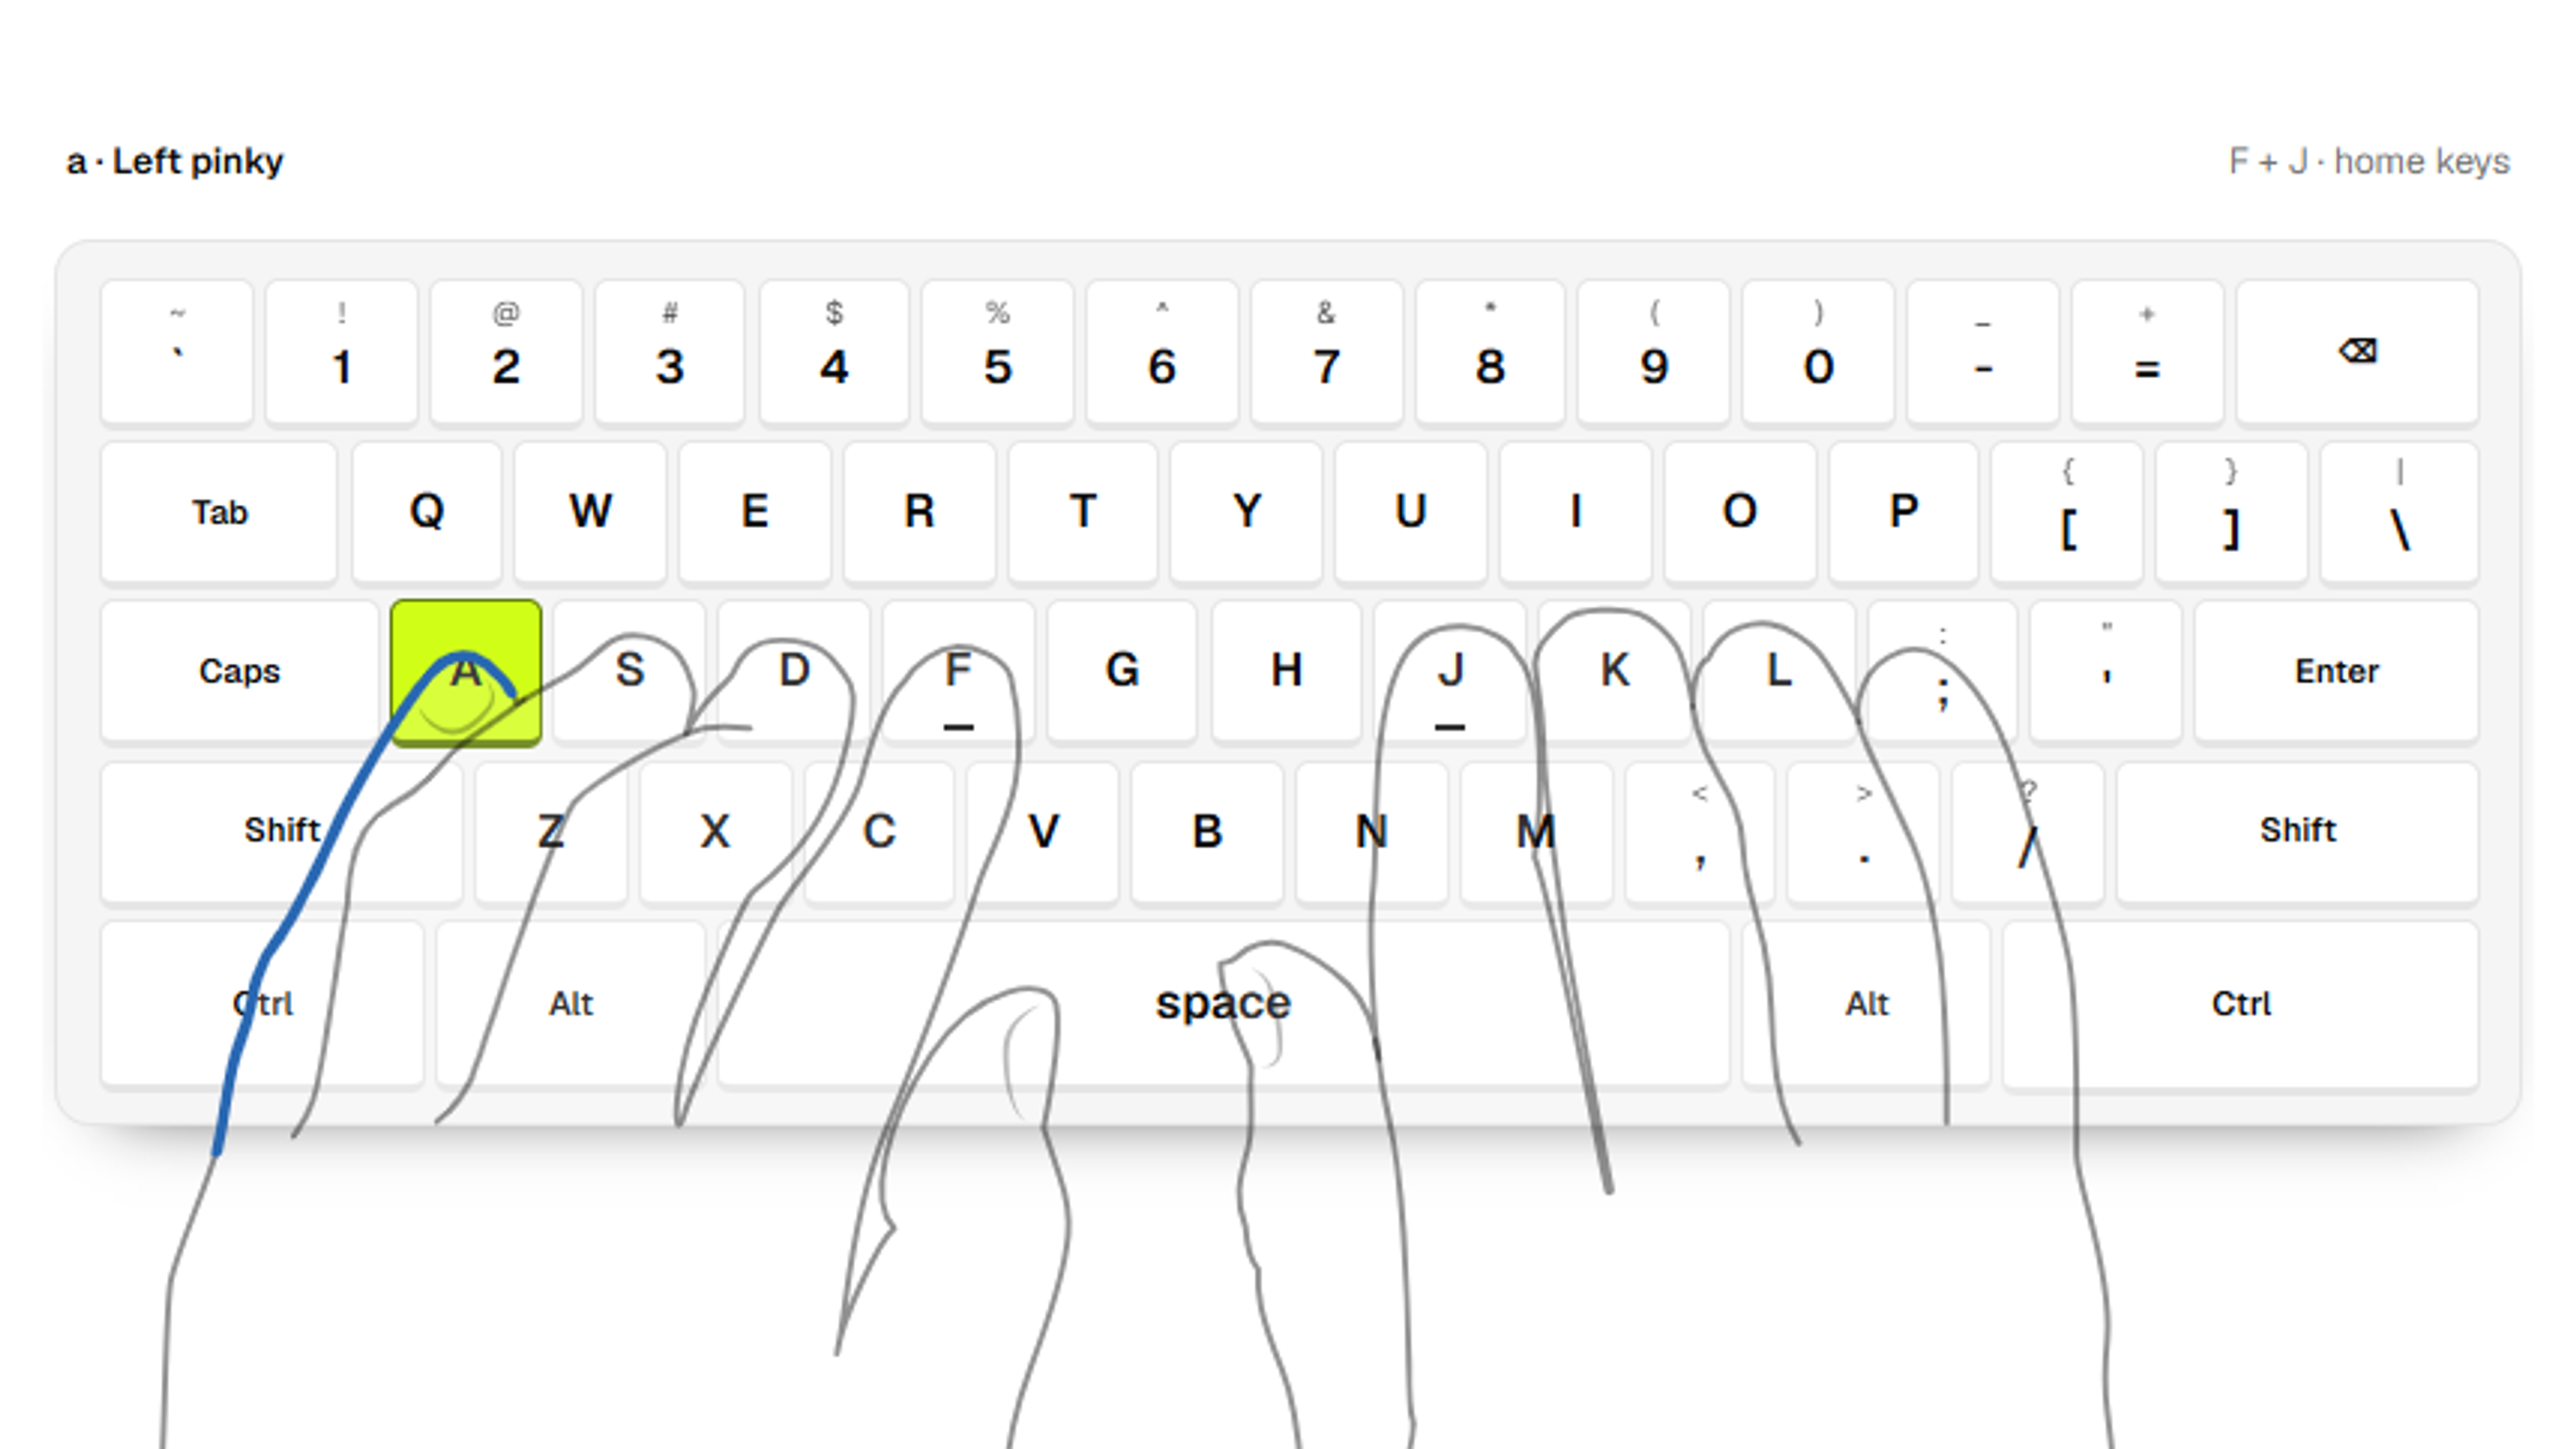
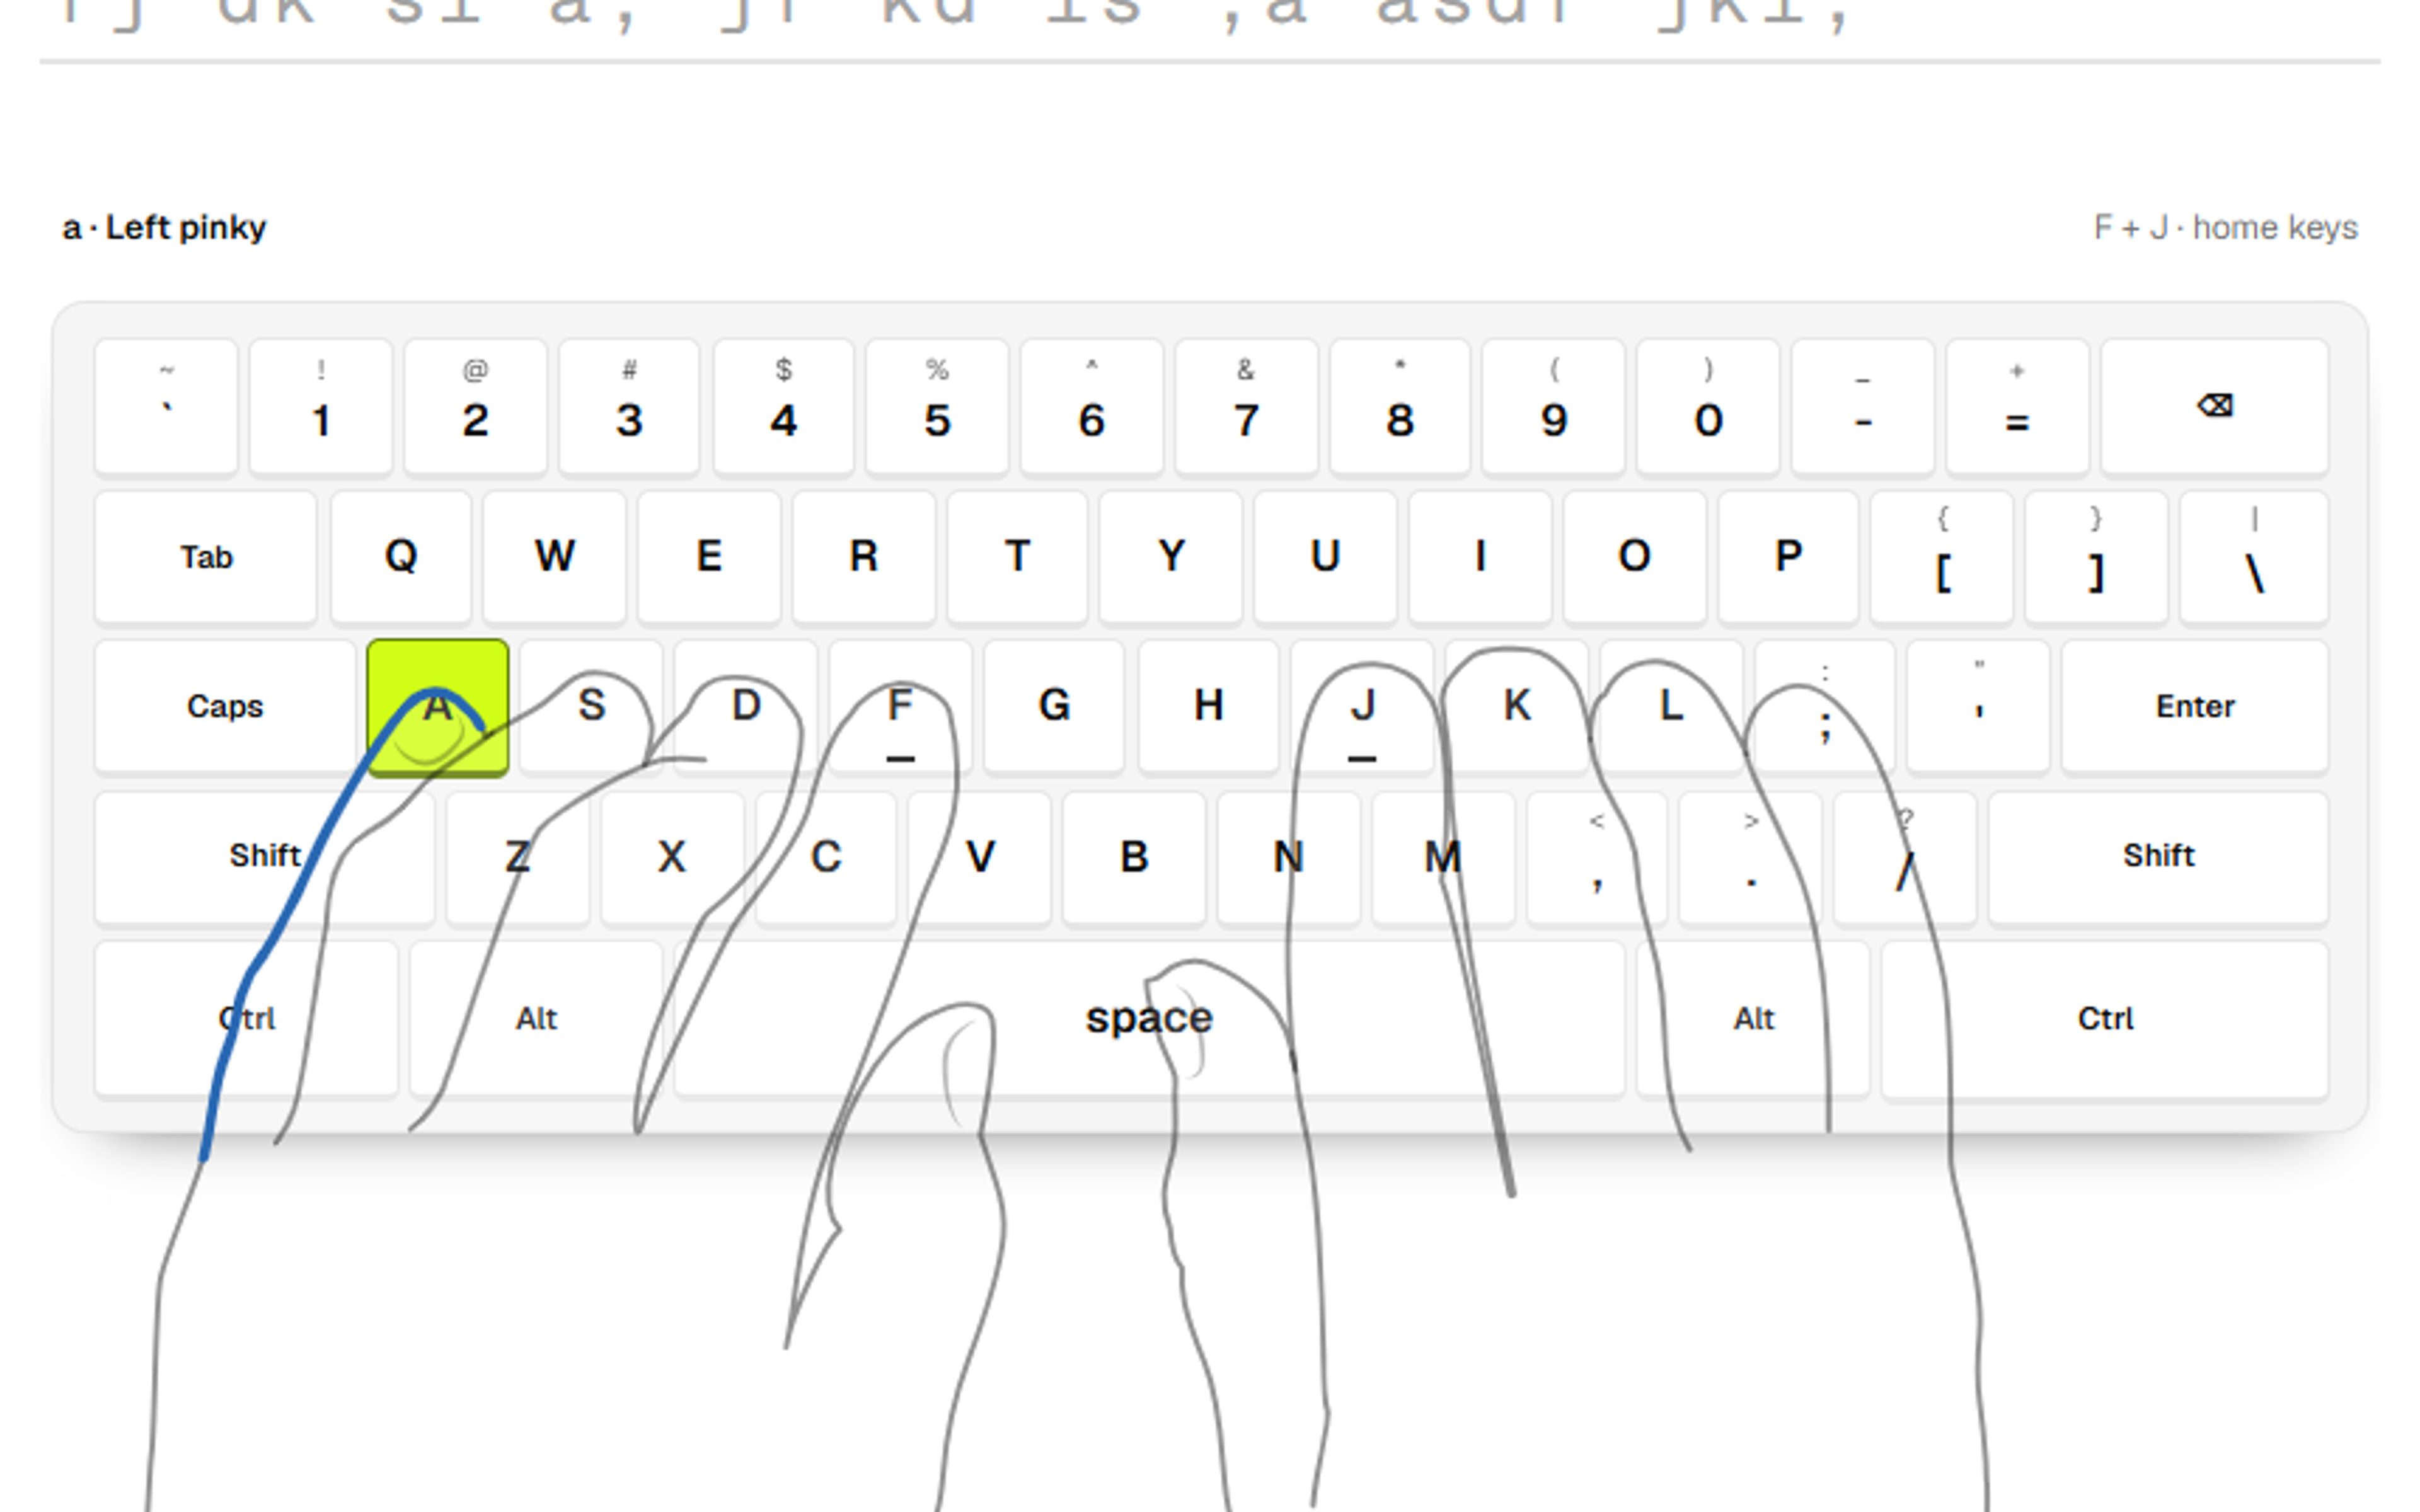
Your first touch typing lesson is about one row of keys. Rest your left fingers on A, S, D and F, and your right fingers on J, K, L and the semicolon key. Your thumbs hover over the space bar. That is the home row, and every other key is reached from it and then left again.
This post is part of our touch typing series. For the full learning path, start with the touch typing guide.
This guide shows where each finger belongs, gives you a finger chart for a US QWERTY keyboard, and sets out a first practice routine. It is the second post in a short series by Alphonix on learning to touch type. For the bigger question of whether it is worth the effort, see is touch typing worth learning. We are also building a touch typing app, Tutype, and say clearly below where we are describing our own plans.
- Home position is A S D F for the left hand and J K L semicolon for the right, with both thumbs on the space bar.
- Each finger owns a column of keys and returns to its home key after every reach. Index fingers cover two columns each.
- Start with the home row only, keep your eyes on the screen, and let accuracy come before speed.
Where your fingers rest
Put your hands on the keyboard so the left index finger sits on F and the right index finger sits on J. Most keyboards have a small raised bar or dot on those two keys so you can find them by touch. Then let the other fingers fall naturally: middle fingers on D and K, ring fingers on S and L, little fingers on A and the semicolon.
Your fingers should be curved and relaxed, and your wrists should not be bent sharply up or down. If your keyboard has no visible bumps, feel for a slightly different texture on F and J, or press them with your index fingers and check that the other fingers line up beside them.

The finger chart
Each finger covers the keys in its own column and goes back to its home key afterwards. The index fingers are the busiest because each covers two columns. The little fingers also look after the keys at the edges, including Shift, Enter and Backspace.
| Option | Good fit | Trade-off |
|---|---|---|
| Index fingers | Left: R T F G V B. Right: Y U H J N M. | Two columns each, so these take the most practice. |
| Middle fingers | Left: E D C. Right: I K and the comma. | Straight up or down from the home key. |
| Ring fingers | Left: W S X. Right: O L and the full stop. | Often the least agile, so go slowly and stay accurate. |
| Little fingers | Left: Q A Z. Right: P, semicolon, slash, plus Shift, Enter and Backspace. | Keep the hand steady instead of twisting the wrist. |
| Thumbs | The space bar. | Either thumb works, so use whichever is comfortable and stay consistent. |
Number keys and symbols follow the same idea, with longer reaches. Learn the letters first. They are the keys you use most, and the number row is easier once the home position feels automatic.
Why the same finger every time matters
In 2016, researchers at Aalto University studied 30 typists. They found that people who took a touch typing course reached a similar average speed and accuracy to self-taught typists who used about six fingers. What did stand out among the faster typists was that they kept their hands in a fixed position and always used the same finger for the same letter. Typists without training also spent about twice as much time looking at their fingers.
It is one small study, so we would not lean on it for more than it says. But it fits the point of the home row: a fixed position and one finger per key is what you are building, and the chart above is how you write that down so you can practise it on purpose.
Your first practice session
Keep a session short, around 5 to 10 minutes, and use only the home row. Look at the screen or the page you are copying, not at your hands. If you keep peeking, rest a sheet of paper over your hands and the keys.
Work in this order, one small step at a time. First, the two index fingers: type F and J on their own, then alternate them, f j f j, returning to home after each press. Second, add the middle fingers with D and K, then try d k d k and fj dk jf kd. Third, add the ring fingers with S and L, and fourth, the little fingers with A and the semicolon. Once all eight keys feel steady, try short words that use only those letters, such as sad, dad, ask, all and fall.
Go slowly enough that you rarely hit a wrong key. If you make several mistakes in a row, slow down until you stop making them. Speed is something that follows once the movements stop needing thought. Sit upright with relaxed shoulders, and stop and adjust your setup if anything hurts.
When the home row feels reliable, reach up and down from it with one finger pair at a time, for example G and H, and always return home. Our next post looks at how long learning touch typing can take and what to expect from short, spaced practice.
How Tutype teaches the home row
Tutype is a web app we are building and plan to launch soon. It is still in development, so this section describes how it is designed to work, and we have no learner results to share.
Its lessons start with the home row and use F and J as anchors, then add one finger pair at a time and return to home. The planned order is F and J, then D and K, then S and L, then A and the semicolon, then short home row words, then G and H, with a check at the end. The app is designed never to show a key you have not been taught yet.
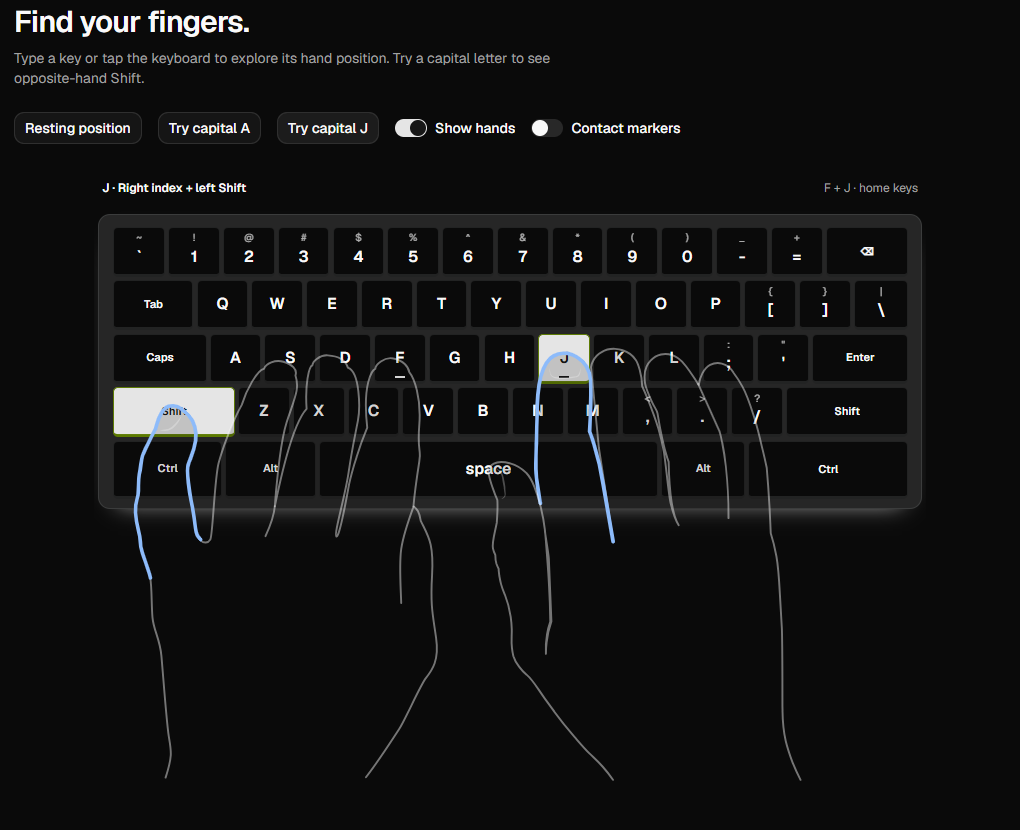
As you improve, the on-screen help is meant to fade, from hands to highlighted keys to the plain keyboard to nothing, so you do not rely on it. There is one honest limit: a browser cannot see which finger you actually used, so any finger advice the app gives is a suggestion, not a fact.
Next step
Try the routine above with a plain document for a few days. If you would like to hear when Tutype launches, or want to talk about using it in a school, get in touch with us. If you are planning a learning product of your own, our product design work is where we start with lessons and screens like these.
How we prepared this guide
Written by Alphonix. The finger chart is the standard US QWERTY touch typing layout, and it matches the finger map used in Tutype, our touch typing app that is in development and not yet launched; we checked the chart against that app's lesson plan and hand guide documentation. The one research claim comes from Aalto University's own news summary of its 2016 study of 30 typists. We publish no learner results because we have none. The finger chart was drawn by Alphonix, and the two app screenshots are from our development build.
Facts reviewed